Hack Your Brain: Draw Water and Other Textures Easily with These Steps
Follow this step by step water texture tutorial to unlock the hacks for drawing all kinds of patterns!
One great part of experiencing art is finding out the process behind doing something and learning how to do it yourself! Making backgrounds can be super scary so I created this tutorial for drawing and painting water. The steps of this process can be easily repeated to create backgrounds with different colors and patterns in the future.
First Steps
We begin with the first steps of creating our piece: laying down the base color. We then move on to the initial shading to plan the rest of the work. If you want to look at a reference photo for further inspiration, this is a great time to do so. You can use sites like Pixabay to find royalty-free images for studying.
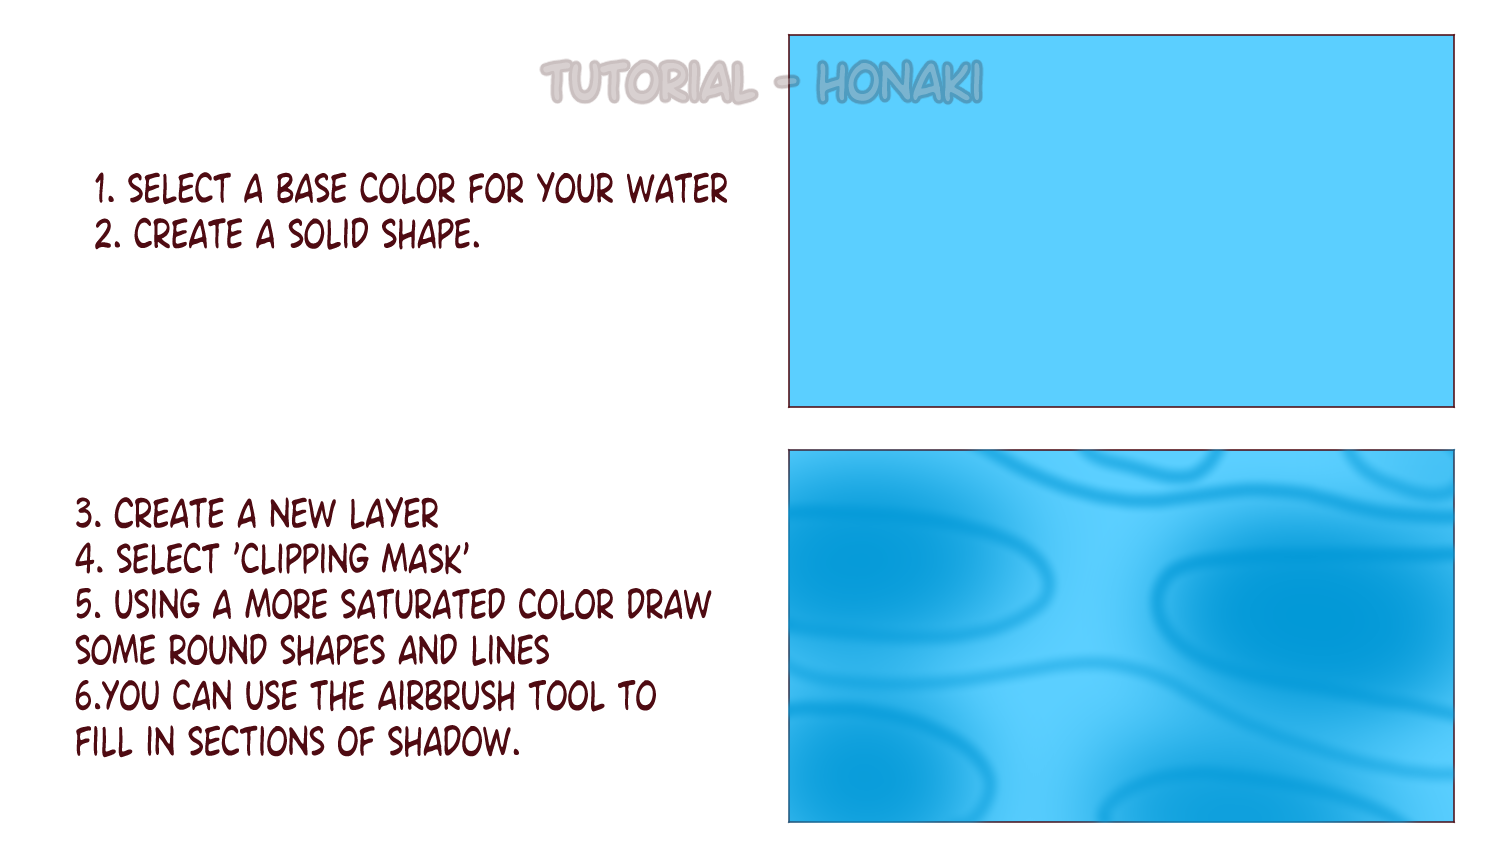
- Select a base color for your water (in this case, blue)
- Create a solid shape (We used the rectangle fill tool)
- Create a new layer (CTRL + SHIFT + N)
- Select 'clipping mask' on the top layer (On the Layer Properties in Clip Studio)
- Using a more saturated color, draw some round shapes and lines
- You can use the airbrush tool to fill in sections of shadow.
Next Steps
Once you have your basic shadows, it's time to move onto shading and highlights. This section is where your drawing will really start to come alive. If this was the sea floor, what would be causing the light to move and reflect like that? The dark and light colors work together to tell that story.
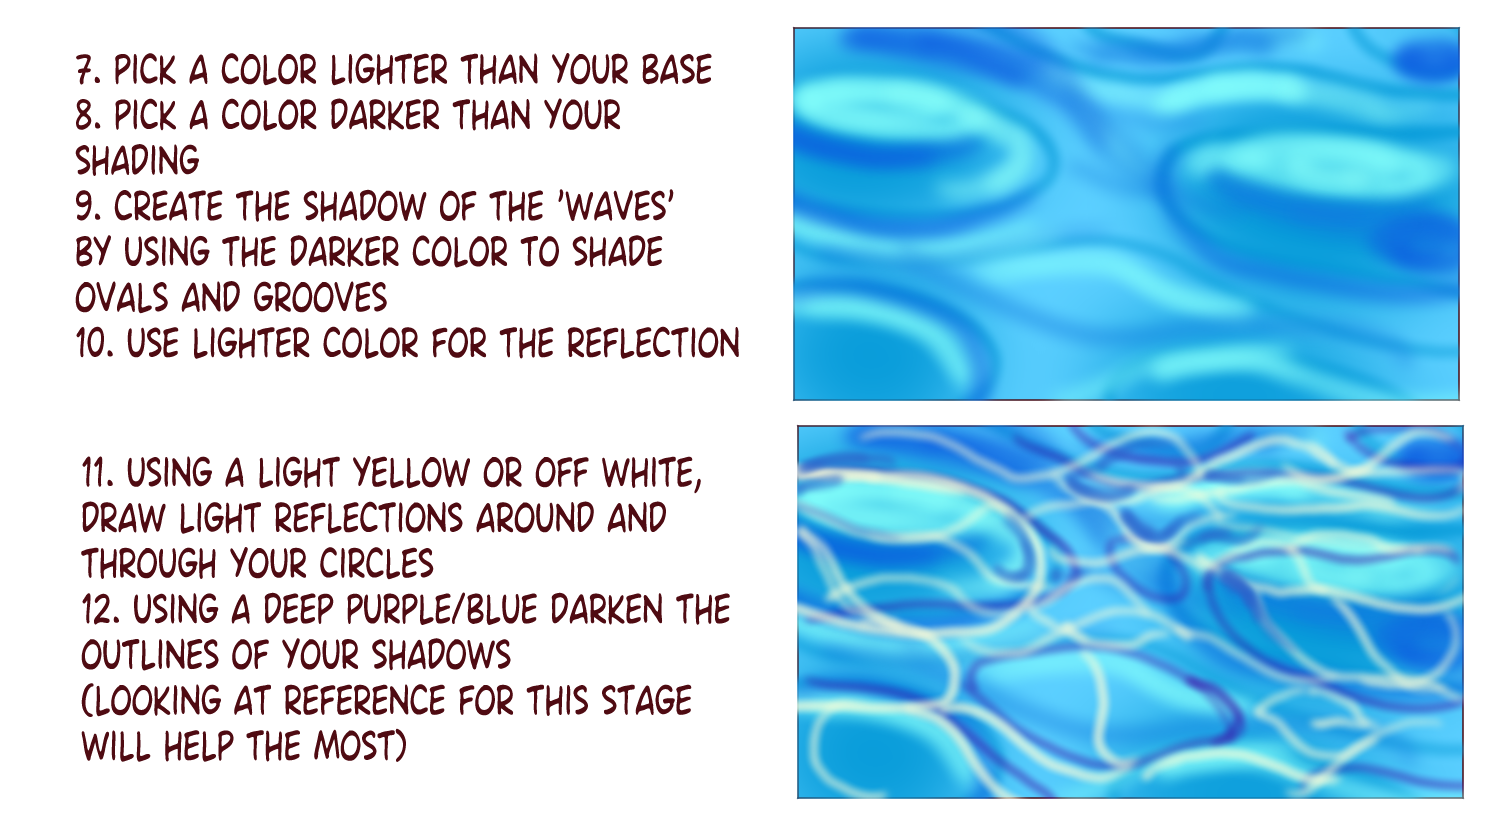
7. Pick a lighter color than your base (we went with light yellow)
8. Pick a darker color than your shading (we went with a dark purple)
9. Create the shadow of the 'waves' by using the darker color to shade ovals and grooves (can use a ref photo)
10. Use the lighter color for the reflection of the waves and lighting
11. Using the light yellow or off-white, draw light reflections around and through your circles
12. Using the darkest color, darken the outlines of your shadows
Final Steps
Now we are on to the final touch-ups before our background is finished! In order to soften the colors we use a blur tool to blend them on the same layer. Next, we can decide if we want to add additional highlights to make things pop. I like to use add glow, but you can also adjust your tone settings or add extra layer effects as you wish.
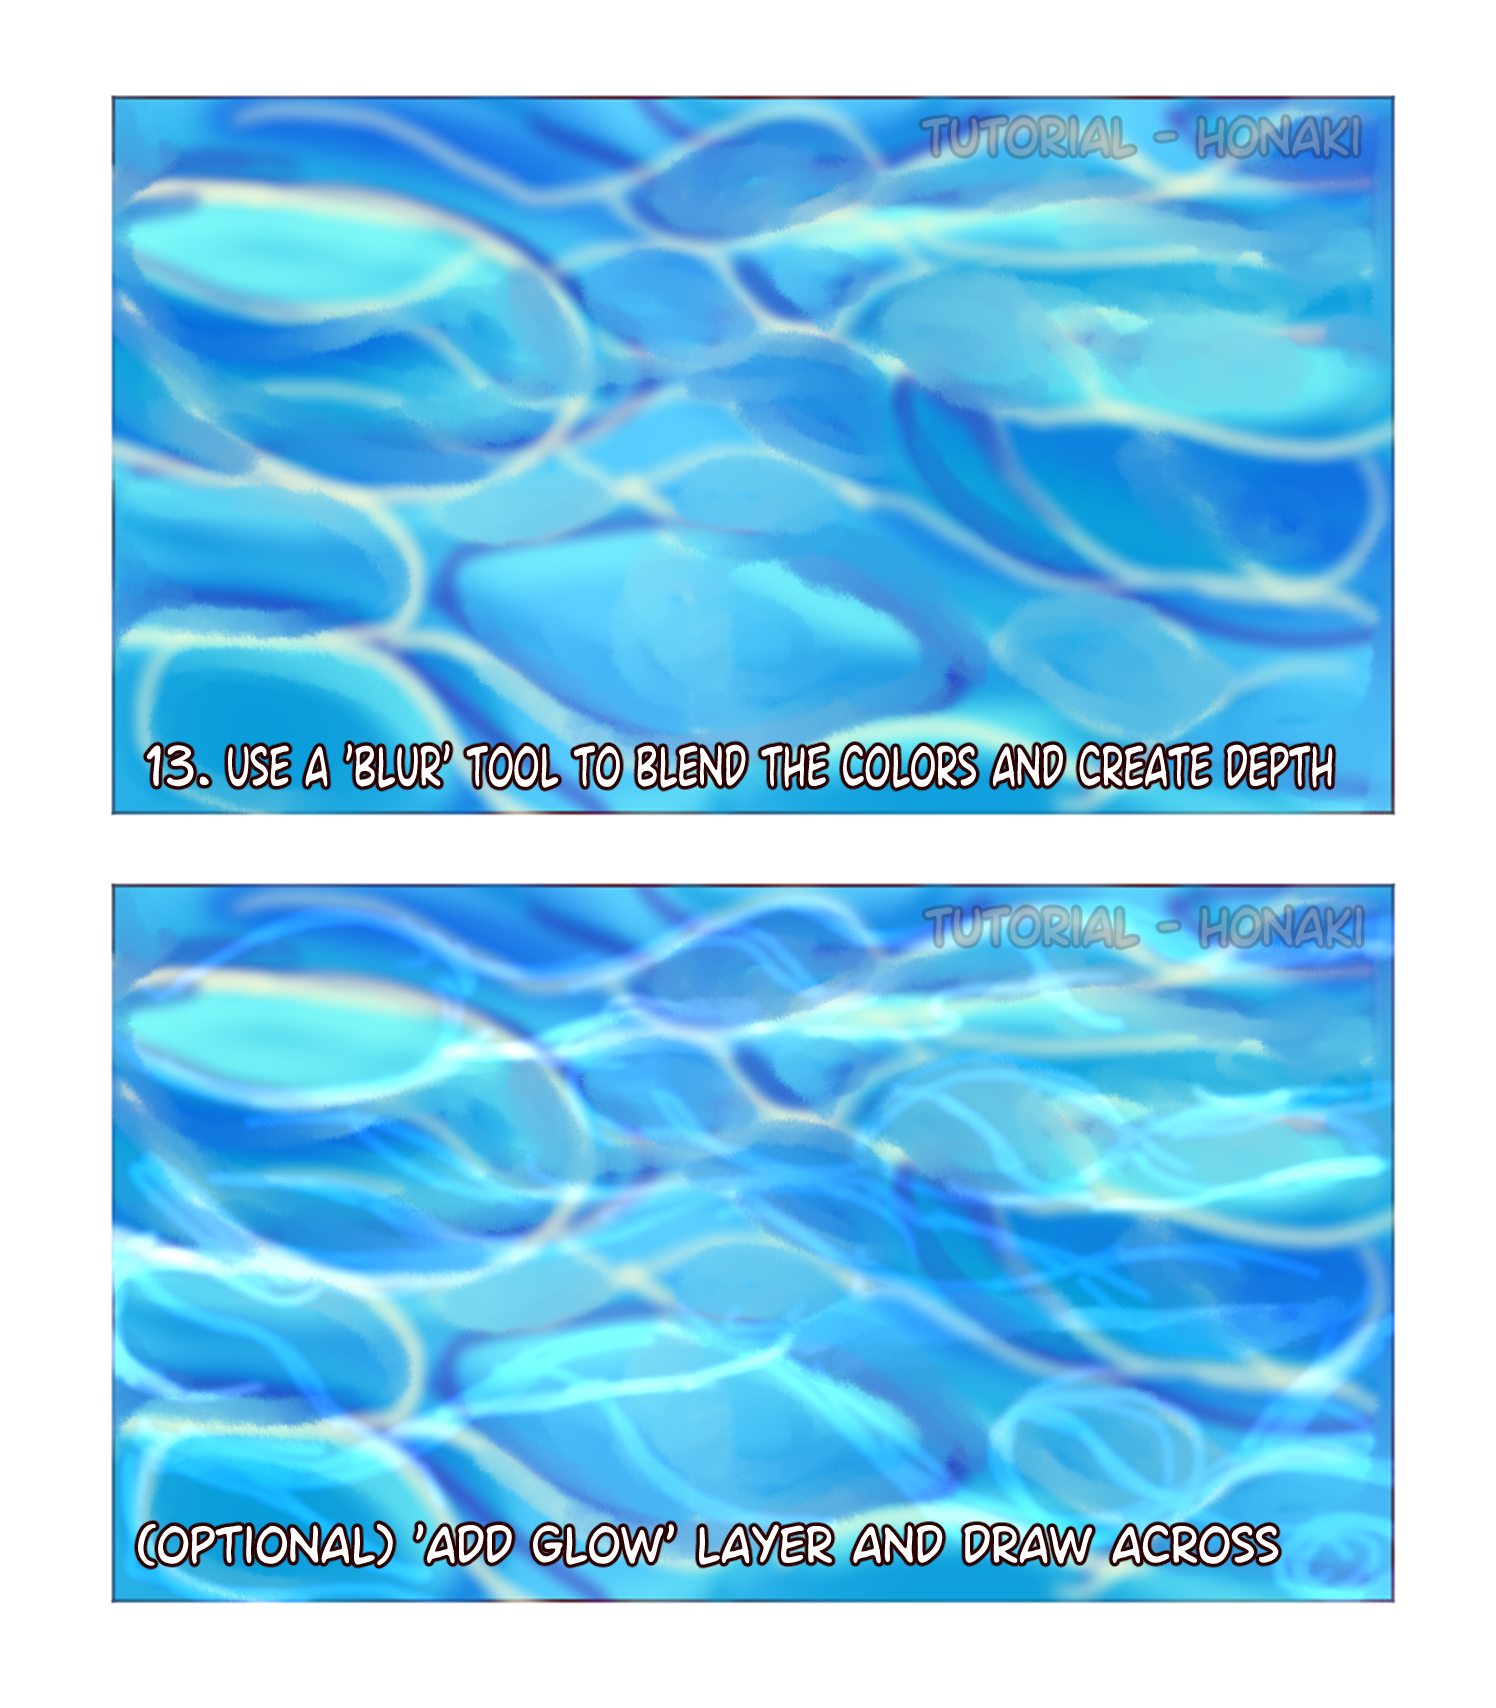
13. Use a 'blur' tool to blend the colors and create depth in your illustration
(optional step) create an 'add glow' layer and draw across the picture with highlights to polish
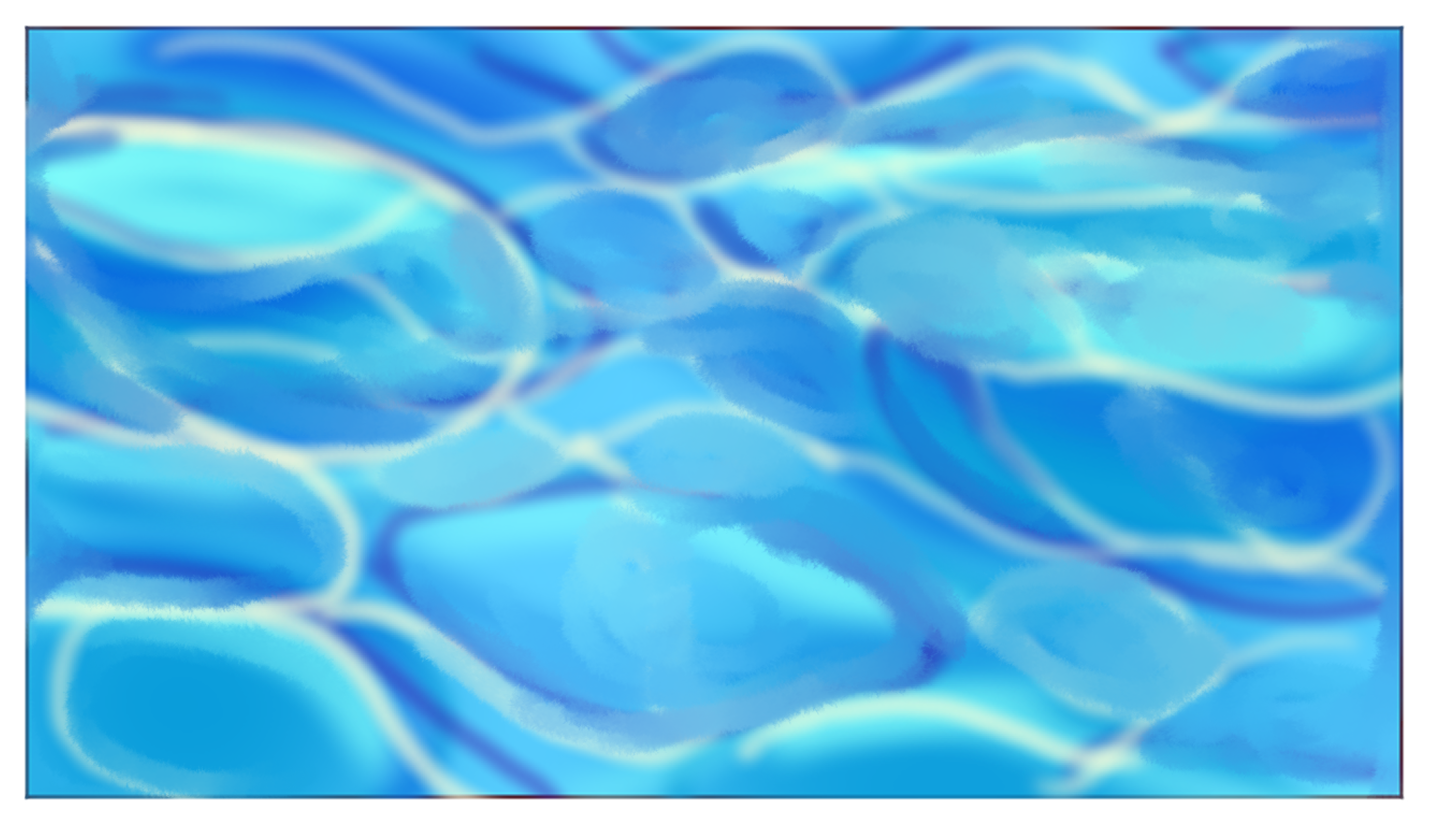
And here is our finished background!
YOU CAN THEN USE THE BACKGROUND YOU CREATED
FOR YOUR OWN PROJECTS AS WELL!
IT COULD BE USED FOR:
- STREAM OVERLAYS
- OC ARTWORK
- VISUAL NOVELS
- ILLUSTRATION BACKGROUNDS
- TINY POOLS OR OTHER BODIES OF WATER
- anything you imagine!
This tutorial on drawing water texture was partly inspired by this post from artist JarofRubies. In the following tutorial, Zenith uses similar techniques to create a holographic effect. This tutorial is really simple and easy to follow with well written instructions. The techniques Zenith uses are very similar to the ones used for the water picture, and by trying out both tutorials you can begin to apply these skills to other types of patterns and effects.
🌈 Simple Holographic Effect Tutorial 🌈
— Zenith ぜんちゃん 🦋🌸 pokemon brainrot (@JarofRubiesArt) January 9, 2023
Iridescence is very hard to get right, but luckily, you don't need a tablet to do this and can just use a mouse on whatever art program you have!
Likes/RTs appreciated! Let me know if this tutorial helped you!
🔻 Text tutorial below 🔻 pic.twitter.com/MtYRbOMCZI
Did you have fun trying out our tutorial? Have you thought of a different pattern you could make by following this process? If so, feel free to reach out to us at UnVale on our Twitter and let us know!
If you believe in supporting small teams with an authentic message and want to support our content, consider creating a profile over at UnVale and checking out our Discord server!